How to print with Voron 2.4? That’s simple.
What you need:
Superslicer (Releases · supermerill/SuperSlicer · GitHub)
Voron 2.4 3D Printer
Procedure
Prepare the slicer config
-
Download the appropriate superslicer executable for your OS
-
Setup and config the superslicer according to your needs.
-
As a shortcut, you can start by import the following config file. However, bear in mind that you need to adjust the parameters according to your needs(eg: enable support, infill % etc)
SuperSlicer_config_bundle.ini (24.6 KB) -
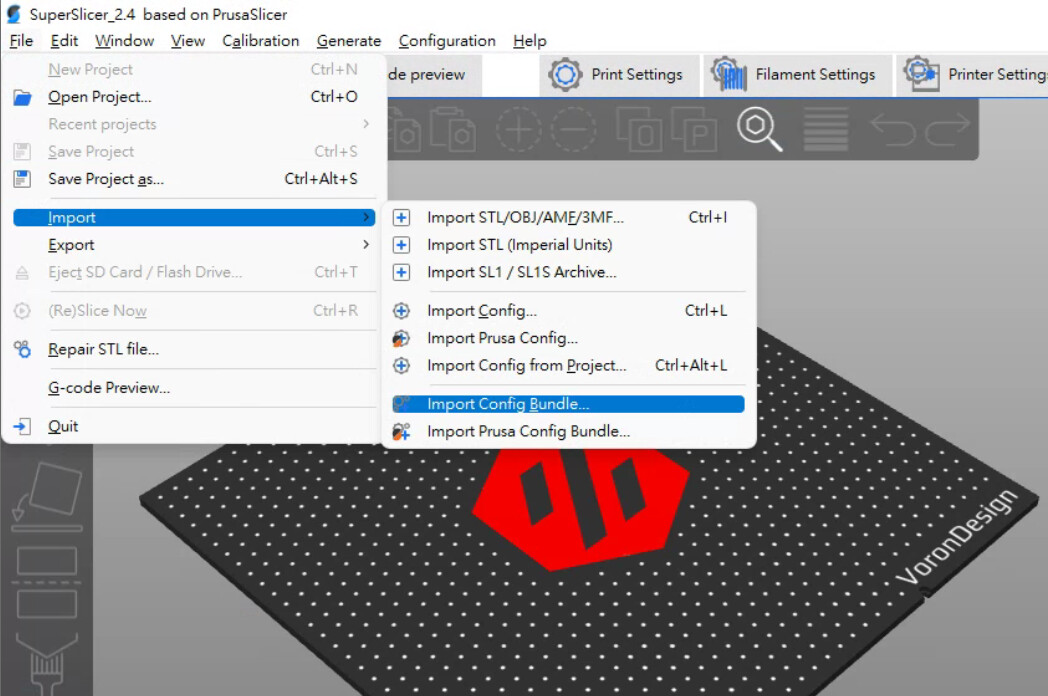
Import the config bundle by clicking the following menu items.
-
Select the imported config.
-
Adjust the parameters according to your needs.
-
Import STL and export Gcode file as usual.


Voron Interfacing
-
Connect to “_IOT Roaming” Wifi network.
-
Access https://voron241.local/ using a browser
-
Preheat the heatbed to 55C, and hotend to 200C. Type the numbers, press “Enter”.
-
Once it reaches 55C, Press “Home ALL”, and then “QGL”
-
If QGL fails to perform due to highly unbalance of the gantry. Click “Motors Off” to turn off motors. Manually adjust the four corners of the gantry by hand, so that gantry becomes as flat as possible, and repeat Step 4 again.
-
If QGL fails due to unstable reading, try to wait for few minutes and repeat step 4 again. (Probe is sensitive to temperature changes)
-
Upload the gcode file.
-
Right click the uploaded gcode file and click Print to start the print job.
-
In case of emergency, you can perform the emergency stop by click this button at the top right corner
-
You can adjust the printing speed by adjust the flowrate.
-
When the printing is completed, pull them out by using your hands, try not to scratch the platform surface.


